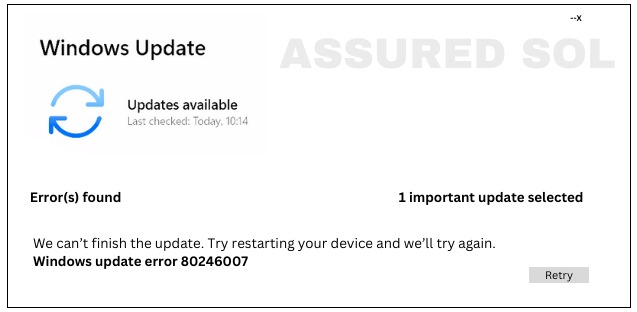
error code 80246007
Fix: Windows Update Error Code 80246007 in Windows 10/11
Windows update error Code 80246007 users may encounter various error codes while performing system updates, and one such code is 80246007. This error can be frustrating, but understanding its causes and implementing the right solutions can help restore seamless update functionality to your system.
Causes of Error Code 80246007:
- Corrupted System Files: Corrupted or damaged system files can disrupt the update process, triggering error code 80246007.
- Network Issues: Poor internet connectivity or network interruptions may prevent your system from downloading the required updates, leading to this error.
- Windows Update Service Glitches: Problems with the Windows Update service itself can contribute to error 80246007. This might include service misconfigurations or conflicts.
- Third-Party Software Interference:Some third-party antivirus or security software may interfere with the update process, causing this error.
Solutions to Fix Error Code 80246007:
Error code 80246007 can be resolved by systematically addressing the potential causes outlined above. It’s advisable to perform these troubleshooting steps carefully
Use the built-in Windows Update Troubleshooter to automatically identify and fix issues related to updates. This tool can address common problems and may resolve error code 80246007.
Check and Repair Corrupted System Files:
- Open a Command Prompt as an administrator
- Run the “sfc /scannow” command.
- This will scan and repair corrupted system files that might be causing the update error.
Reset Windows Update Components:
Manually reset the Windows Update components by stopping related services, deleting temporary update files, and restarting the services. This can resolve service-related glitches.Resetting Windows Update components can help resolve issues with updates.
Here are the steps:
1. Stop Windows Update Service:
Open Command Prompt as Administrator and run- net stop wuauserv
- Stop BITS Service:
2.In the same Command Prompt window, run:
- net stop bits
3.Rename Software Distribution and Catroot2 folders:
Navigate to the following path in File Explorer- C:\Windows
4.Locate and rename: The “Software Distribution” folder to “Software Distribution old”.
- Do the same for the “Catroot2” folder.
5.Restart Services: Restart the Windows Update and BITS services:
- net start wuauserv
- net start bits
6.Reset Windows Update Components:
- Open Command Prompt as Administrator and run the following commands:
- netsh winsock reset
- netsh winhttp reset proxy
7. Restart Your Computer:
Reboot your system to apply the changes.
After these steps, try checking for updates again. This process essentially clears the Windows Update cache and resets the components, which can help resolve update-related issues.
Disable Third-Party Antivirus Software:
Temporarily disable or uninstall third-party antivirus or security software to eliminate the possibility of interference with the update process. Ensure that Windows Defender is enabled for basic protection during this period.
Check Internet Connectivity:
Ensure a stable and reliable internet connection. Switching to a different network or troubleshooting your current connection may help overcome network-related issues.
Perform a Clean Boot:
Boot your system in a clean state by disabling unnecessary startup programs and non-Microsoft services. This helps identify if third-party software is causing the update problem.
Performing a clean boot on Windows involves disabling startup programs and non-Microsoft services. Here are the steps:
- 1. Press Win + R to open the Run dialog.
- 2. Type msconfig and press Enter.
- 3. In the System Configuration window, go to the “General” tab.
- 4. Select “Selective startup.”
- 5. Uncheck “Load startup items.”
- 6. Go to the “Services” tab.
- 7. Check “Hide all Microsoft services.”
- 8. Click “Disable all” to disable non-Microsoft services.
- 9. Move to the “Startup” tab.
- 10. Click “Open Task Manager.”
- 11. Disable startup programs by right-clicking and selecting “Disable.”
- 12. Close the Task Manager.
- 13. Back in the System Configuration window, click “Apply” and then “OK.
- 14. You’ll be prompted to restart your computer. Do so to apply the changes.
This clean boot helps identify if a third-party application or service is causing issues on your system. To revert to normal startup, repeat the steps but choose “Normal startup” in the System Configuration’s General tab.
Install Updates Manually:
Download the required updates manually from the Microsoft Update Catalog and install them one by one. This method allows you to bypass potential issues with the automatic update process.
Conclusion:
If the issue persists, seeking assistance from Microsoft support or online forums can provide additional insights and solutions tailored to your specific system configuration. Regularly maintaining your system and keeping it up-to-date is crucial for optimal performance and security.

